
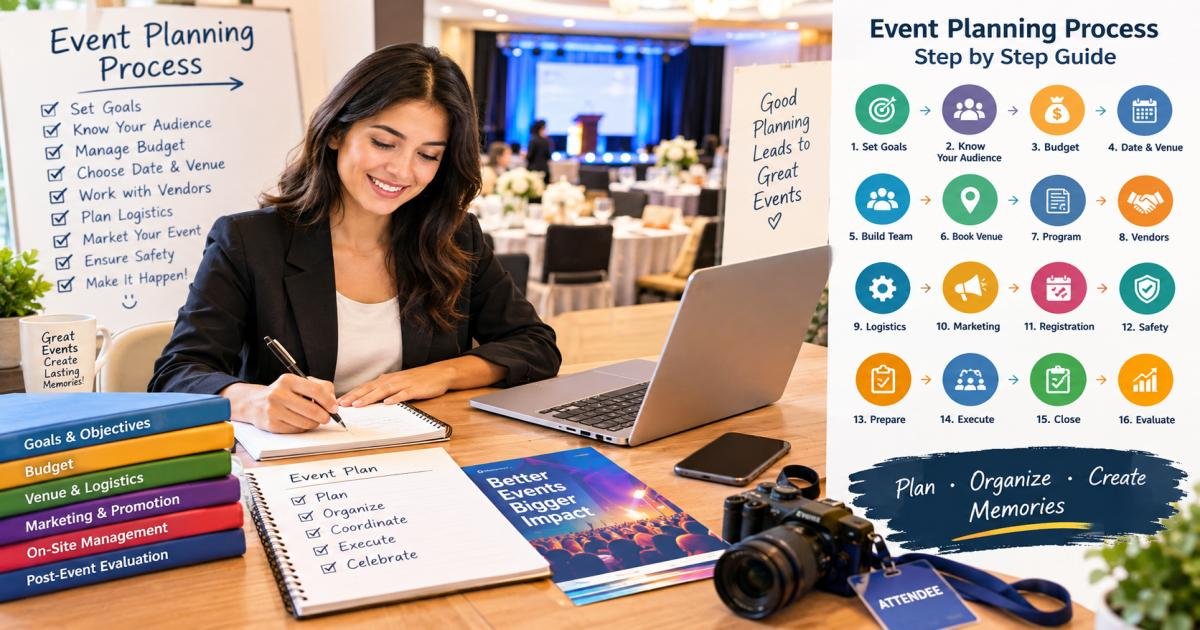
Event planning process step by step guide: Planning a Successful Event
The event planning process step by step guide comes down to one idea: break a big goal into small tasks, and handle them in the right order. Whether you’re organizing a wedding, a business conference, or a neighborhood fundraiser, the same basic path works. You set clear goals, build a budget, pick a date and venue, line up vendors, promote the event, run it, and then review how it went.
A messy event rarely comes from bad luck. It comes from skipped steps. Someone forgets to confirm the caterer. No one checks if the venue has parking. The budget runs dry halfway through planning. Event planners who build a 10 to 15 percent buffer into their budget from the start typically avoid these last-minute scrambles, because they have room to absorb the surprises that always show up.
This guide covers the full event planning lifecycle from the first idea to the final report. You’ll get a 16-step process, a planning timeline, a reusable checklist, guidance for different event types, common mistakes to avoid, and answers to the questions people ask most about how to plan a successful event.
Here’s the direct answer, then the full breakdown.
What is the Event planning process step by step guide?
The event planning process is the set of steps you follow to organize and run an event from start to finish. It includes setting goals, creating a budget, choosing a date and venue, booking vendors, marketing the event, managing registration, running the event, and reviewing the results.
Think of it like building a house. You don’t start with paint colors. You start with a foundation, then walls, then a roof, then the finishing touches. Event planning follows the same order. Skip the foundation your goals and your budget and everything built on top of it gets shaky fast.
The process stays the same no matter the size of the event. A 20-person birthday party and a 2,000-person conference both move through the same stages. The difference is scale, not structure. Small events move through these steps in days. Large events typically need six months to a year, plus a full planning team.
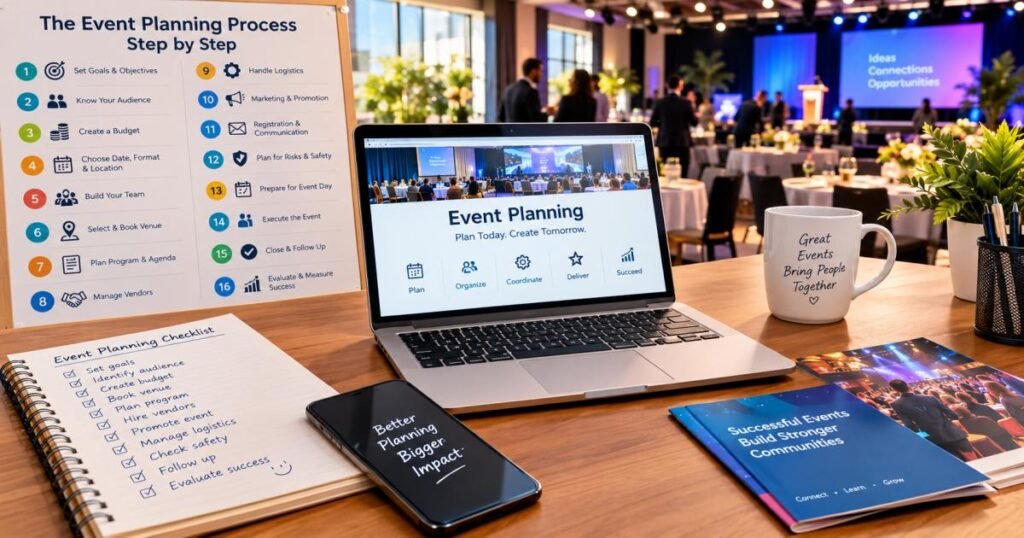
Event planning process step by step guide
Here’s the complete breakdown. Work through these in order, and adjust the depth of each step to match the size of your event.
Step 1: Define Your Event Goals and Objectives
Before you open a calendar or a budget sheet, write down why you’re holding this event. Are you raising money, celebrating a milestone, launching a product, teaching a skill, or building community ties? The answer shapes every decision that follows.
Set one main goal and two or three supporting objectives. A main goal might read “raise brand awareness,” with objectives like “reach 500 attendees” and “generate 100 qualified leads.” Clear goals give you a way to measure success later, and they help you reject ideas that don’t serve the purpose.
Step 2: Identify Your Target Audience
Know exactly who you’re planning for. Are you hosting industry professionals, families, students, or donors? Your audience shapes the venue, the schedule, the food, the marketing tone, and even the time of day you choose.
Build a short audience profile: age range, interests, reason to attend, and what would make the event worth their time. This keeps your decisions grounded in real people instead of assumptions.
Step 3: Set an Event Budget
Money problems derail events faster than almost anything else. List every likely cost: venue rental, catering, décor, entertainment, staffing, marketing, insurance, and technology. Add a buffer of 10 to 15 percent for surprises, because something unplanned almost always comes up.
Rank your expenses by priority. If money gets tight later, you’ll know exactly what to cut without damaging the parts of the event tied to your original goals.
Step 4: Choose the Event Date, Format, and Location
Pick a date that avoids holidays, major local events, and known conflicts for your audience. Decide on the format too: in-person, virtual, or hybrid. This single decision drives your venue search, your technology needs, and a large share of your budget.
For location, weigh travel distance, accessibility, and the feel you want guests to walk away with. A rooftop venue sends a different message than a hotel ballroom, even for the same type of event.
Step 5: Build Your Event Planning Team
Even small events run better with shared responsibility. Assign owners for logistics, vendor communication, marketing, registration, and day-of coordination. On larger events, give each area a lead so no single person becomes a bottleneck.
Clear roles stop the common failure where a task goes unfinished because everyone assumed someone else was handling it.
Step 6: Select and Book the Venue
Once you know your date, budget, and headcount, start touring venues. Check capacity, layout, parking, accessibility, built-in equipment, and cancellation terms. Ask what’s included versus what costs extra; hidden fees quietly break more event budgets than almost any other single factor.
Book early. Strong venues typically get reserved months ahead, especially during peak seasons like spring and early fall.
Step 7: Create the Event Program and Agenda
Map the flow of the event hour by hour, or minute by minute for tightly run programs. Include arrival time, opening remarks, main activities, breaks, meals, and closing. A well-paced agenda keeps guests engaged and cuts out dead time.
Share a draft agenda with speakers, performers, or key participants early, so everyone knows their slot and can prepare.
Step 8: Hire and Manage Vendors and Suppliers
Line up caterers, decorators, photographers, AV technicians, and transportation providers based on your budget and event style. Put everything in writing: delivery times, setup windows, and what happens if something falls through.
Keep one vendor tracking sheet with contact names, contract status, deposit amounts, and final payment dates. This single document removes most of the stress that builds up in the final weeks.
Step 9: Plan Event Logistics and Operations
Logistics cover the practical, behind-the-scenes work: seating layout, signage, parking flow, restroom locations, power access for equipment, and backup supplies. Guests rarely notice these details when they’re handled well, but they notice immediately when they’re missing.
Walk the venue mentally, or in person, from the moment a guest arrives to the moment they leave. That walkthrough surfaces gaps you’d otherwise miss.
Step 10: Create an Event Marketing and Promotion Plan
Decide how people will hear about your event: email campaigns, social media, local press, partner promotion, or paid ads. Match your channels to where your target audience actually spends time, rather than every channel available.
Set a promotion timeline with fixed milestones: a save-the-date three months out, formal invitations two months out, and reminder messages in the final two weeks.
Step 11: Set Up Registration and Attendee Communication
Choose a registration system that fits your event size, from a simple form to dedicated event software. Keep signup short and mobile-friendly; long forms typically cut sign-up rates, since most people register from their phone.
Send a confirmation email right after registration, then follow up with practical details like parking instructions, dress code, and schedule reminders as the date gets closer.
Step 12: Plan for Risk, Safety, and Emergencies
Every event needs a basic safety plan. List the realistic risks: severe weather, a medical issue, a technology failure, low turnout, and write a short response plan for each one.
Confirm your insurance coverage, know the venue’s emergency exits and procedures, and make sure key staff know exactly who to call if something goes wrong. This planning rarely gets used, but it matters completely when it does.
Step 13: Prepare for Event Day
In the final days, confirm every vendor, finalize printed materials, charge all equipment, and brief your team on their roles. Build a run-of-show document with exact times, responsibilities, and emergency contacts.
Do a final walkthrough of the venue if you can. A fix made the day before costs far less time and stress than the same fix made the day of.
Step 14: Execute and Manage the Event
On event day, your role shifts from planner to problem-solver. Arrive early, oversee setup, greet vendors, and stay available for fast decisions. Assign one point person for guest questions so you aren’t pulled in five directions at once.
Stay calm when small issues come up, because they typically do. Guests rarely notice a minor hiccup unless the team visibly panics over it.
Step 15: Close the Event and Handle Post-Event Tasks
Once the event ends, oversee breakdown, confirm every rented item is returned, and settle final vendor payments. Collect leftover materials, thank your team, and send appreciation messages to speakers, sponsors, and volunteers.
This wrap-up phase gets rushed more often than any other step, but handling it well protects your vendor relationships and your reputation for the next event.
Step 16: Evaluate the Event and Measure Success
Compare your results against the goals you set in Step 1. Did you hit your attendance target? Did you stay inside budget? Gather feedback through a short survey or direct conversations, and write down what worked and what didn’t.
This final step turns one event into a training ground for every event you plan after it.
Event Planning Timeline: What to Do and When
6–12 Months Before the Event
Define your goals, set your budget, choose a date, and book your venue. For large events like conferences or weddings, this is also when you lock in major vendors caterers and entertainment- who book up first.
3–6 Months Before the Event
Finalize your program and agenda, hire remaining vendors, and launch your marketing plan. Open registration and start building promotional momentum.
1–3 Months Before the Event
Confirm all vendor details, finalize logistics, and increase marketing activity. Send formal invitations if you haven’t already, and track RSVPs closely.
2–4 Weeks Before the Event
Send reminder communications, confirm final headcounts with your venue and caterer, prepare materials, and brief your team on event-day responsibilities.
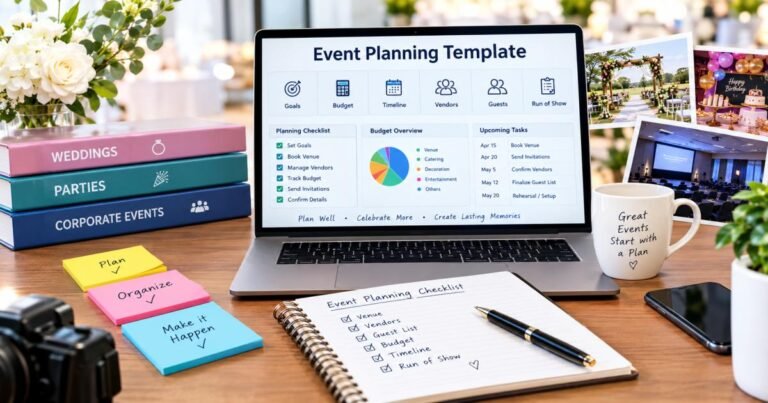
Event Planning Checklist
Before the Event
- Goals and budget finalized
- Venue booked and confirmed
- Vendors contracted
- Marketing plan launched
- Registration system live
- Safety and emergency plan in place
During the Event
- Team briefed on roles
- Setup completed and inspected
- Guest check-in running smoothly
- Schedule followed with room for adjustments
- Point person available for issues
After the Event
- Breakdown and equipment return handled
- Vendor payments settled
- Thank-you messages sent
- Feedback collected
- Results measured against goals
How to Plan Different Types of Events
Corporate Events
Corporate events need a clear business purpose: team building, client appreciation, or a company milestone. Keep the agenda professional but not rigid, and tie the event back to brand messaging throughout.
Conferences and Seminars
Conferences need strong session planning, speaker coordination, and reliable presentation technology. Attendee satisfaction often hinges on networking time as much as the sessions themselves, so build unstructured time into the agenda.
Weddings and Social Events
Weddings and social events center on personal meaning. Put the couple’s or host’s vision first, manage the guest list carefully, and build extra buffer time into the schedule, since personal events typically run behind by 15 to 30 minutes.
Fundraising and Nonprofit Events
Fundraisers succeed when the ask is clear, and the connection to the cause feels real. Keep overhead costs low so more of the money raised reaches the mission, and follow up with donor appreciation right after the event.
Trade Shows and Exhibitions
Trade shows depend on booth logistics, lead capture systems, and outreach to attendees before the event opens. Coordinate closely with exhibitors on setup times and shipping schedules, since delays here cascade fast.
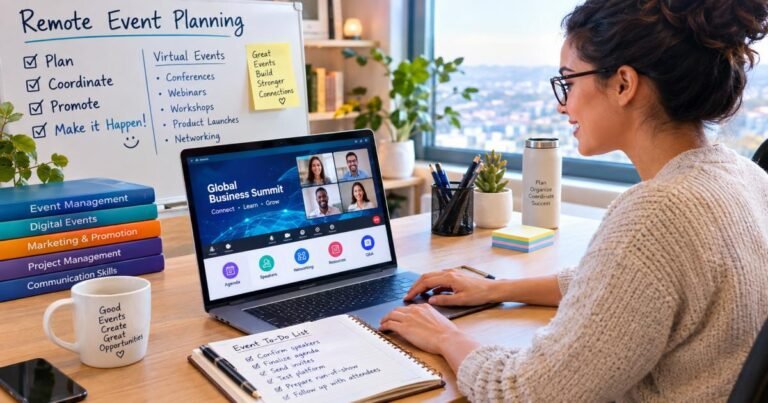
Virtual and Hybrid Events
Virtual and hybrid events need reliable streaming technology, engaging on-screen content, and a plan for interaction through live chat or polls. Test every piece of technology more than once before going live.
Community Events
Community events run on local partnerships and volunteer support. Keep the plan simple, lean on local resources, and prioritize accessibility so every community member can take part.
Common Event Planning Mistakes to Avoid
Most event problems trace back to the same handful of mistakes. Starting too late tops the list, since it limits venue and vendor options right away. Underestimating the budget follows close behind, often because planners forget smaller costs like signage, permits, or gratuities.
Poor communication with vendors and team members creates confusion that surfaces on event day. Skipping a backup plan for weather or technology failure leaves you exposed the moment something goes wrong. And skipping the post-event evaluation means losing lessons that would have improved the next event.
Practical Tips for a Successful Event
Build extra time into every deadline, since tasks typically take longer than planners expect. Keep one master document with every detail, contact, and deadline, so nothing lives only in someone’s memory. Communicate with your team and vendors on a set schedule, even when there’s nothing new to report.
Stay flexible on event day. The planners who run the smoothest events aren’t the ones who avoid problems; they’re the ones who solve them quietly and quickly, without disrupting the guest experience.
Final Thoughts
Planning a successful event doesn’t come down to luck. It comes down to a clear process, honest budgeting, and steady communication with your team and vendors. Follow the event planning process step by step, and you replace last-minute stress with organized, confident action.
Use this guide as a repeatable framework for any event on your calendar, from a small community gathering to a large-scale conference. Each step builds on the one before it, and each event you run will move a little more smoothly than the last.
FAQs
What are the steps in the event planning process?
The main steps are setting goals, defining your audience, building a budget, choosing a date and venue, assembling a team, booking vendors, planning logistics, marketing the event, managing registration, preparing for risks, running the event, and evaluating results afterward.
What should you do first when planning an event?
Define your event goals and objectives first. Every later decision budget, venue, marketing depends on knowing what the event needs to achieve.
How far in advance should you start planning an event?
Large events like conferences or weddings typically need 6 to 12 months of lead time. Smaller events can often come together in 1 to 3 months, depending on complexity and vendor availability.
What should an event planning checklist include?
A solid checklist covers pre-event tasks like budget and venue booking, day-of tasks like setup and guest management, and post-event tasks like vendor payments and feedback collection.
How do you create an event budget?
List every expected cost venue, catering, décor, marketing, and staffing then add a buffer of 10 to 15 percent for unexpected expenses. Prioritize spending based on what matters most to your event goals.
What makes an event successful?
A successful event meets the goals set at the start, whether that’s attendance numbers, funds raised, or guest satisfaction. Smooth logistics and a positive guest experience are strong signs the event worked.
What are the biggest mistakes in event planning?
The most common mistakes are starting too late, underestimating the budget, poor vendor communication, skipping a risk management plan, and failing to evaluate the event once it ends.
How do you evaluate an event after it ends?
Compare the actual results to your original goals, gather feedback from attendees and team members, and write down the lessons learned. That record turns one event into a better plan for the next one.


6 Comments