
DIY Christmas Decorations: Easy Ideas for the Tree, Home, Door & Table
DIY Christmas decorations are holiday pieces you make by hand from low-cost materials like paper, felt, twine, pinecones, jars, and dried fruit. The easiest ones to start with are paper snowflakes, salt dough ornaments, dried orange slices, and a simple evergreen wreath. Most take under an hour, and most cost under $10.
Quick answer: Start with one project per area. Make salt dough ornaments for the tree, a grapevine wreath for the door, and a pinecone centerpiece for the table. You can finish all three in a weekend.
A handmade ornament holds a story. You made it at the kitchen table, or you found the pinecones on a cold walk. A store-bought bauble rarely does that.
Homemade Christmas decorations also let you set the look. You pick the colors, the size, and the style. You can spend $5 or $100. You can go bright and loud, calm and clean, or warm and rustic.
This guide covers four areas: the tree, the home, the door, and the table. You will also find style guides, kid-friendly crafts, safety rules, and storage tips.
Why Make Your Own DIY Christmas Decorations?
Here is what makes handmade holiday décor worth the effort.
It costs less. A single glass ornament often runs $5 or more. A batch of salt dough ornaments costs a couple of dollars in flour and salt. Across a whole house, the gap grows fast.
It feels personal. No other home will match yours. Handmade pieces show your taste, your family, and your year.
It gives you a reason to sit together. Many families keep a yearly ornament night. Each person makes one piece, and the tree turns into a timeline.
It cuts waste. Jars, cardboard, fabric scraps, and fallen branches get a second life.
It slows the season down. A quiet hour with music and a glue gun is a break from the rush.
You control the materials. You can choose pet-safe, kid-safe, and weatherproof supplies for your own home.
What You Need to Make DIY Christmas Decorations
You do not need a craft store haul. A small kit covers most projects.
Tools
- Scissors (one pair for paper, one for fabric)
- Hot glue gun and extra glue sticks
- Craft knife
- Ruler and pencil
- Floral wire and wire cutters
- Needle and strong thread
- Brushes in two or three sizes
Supplies
- Twine, jute, and ribbon
- Plain and colored paper
- Cardboard (cereal boxes work well)
- Acrylic paint and clear sealer
- Flour and salt for salt dough
- Pinecones, twigs, and cinnamon sticks
- Battery-powered fairy lights
- Clear glass jars
- Felt and fabric scraps
Free finds
- Pinecones and fallen branches from your yard (check local rules before you collect in parks)
- Old books, maps, and sheet music
- Empty jars and tin cans
- Used wrapping paper
Two habits that save projects:
- Lay out every item before you start. Most stalled crafts stall because one thing is missing.
- Test paint and glue on a scrap first. Some paints dry a different shade.
DIY Christmas Decorations for the Tree
The tree is the center of most holiday homes. Handmade pieces make it one of a kind.
Homemade Christmas Ornaments
Ornaments make the best first project. They are small, quick, and forgiving.
Salt dough ornaments. Mix 2 cups of flour, 1 cup of salt, and about 1 cup of water. Knead until smooth. Roll to about ¼ inch thick, cut shapes, and poke a hole at the top. Bake at 250°F (120°C) for two to three hours until hard. Cool, paint, and seal with clear varnish. Keep them away from pets, since the salt can harm them.
Dried orange slices. Cut slices about ¼ inch thick and pat them dry. Bake at 200°F (95°C) for roughly three to four hours, flipping once. Add a twine loop. They smell good and glow in the light.
Felt shapes. Cut two matching stars, trees, or mittens. Stitch or glue the edges, add a little stuffing, and close the gap. Felt does not shatter, so it suits homes with kids and pets.
Filled clear baubles. Fill plain clear ornaments with faux snow, tiny pinecones, or paper confetti. Tie on a ribbon.
Wooden bead ornaments. Thread beads on a wire bent into a star or heart. The look is clean and modern.
DIY Christmas Tree Garlands
A garland ties the tree together. These four work well:
- Popcorn and cranberry garland. Use plain, air-popped popcorn that is a day old, since it crumbles less. Thread it with cranberries on strong thread. Food garlands suit short-term or outdoor use because they can attract pests.
- Paper chain garland. Cut strips, loop them, and link them. Kids love this one.
- Pom-pom garland. Make yarn pom-poms and tie them to a long string. Two or three colors look tidy.
- Dried fruit garland. Alternate orange slices, cinnamon sticks, and bay leaves.
Rule of thumb: A 6-foot tree typically looks full with about 25 to 40 feet of lightweight garland. Add less for thick bead strands.
DIY Christmas Tree Topper Ideas
A topper finishes the tree. Keep it light, because a heavy one bends the top branch.
- Fabric bow. Velvet or burlap, wired to the top branch.
- Paper star. Fold and glue paper strips into a 3D star.
- Twig star. Bind five thin sticks with twine.
- Pinecone snowflake. Wire small pinecones into a starburst.
- Wire and bead star. Bend craft wire and add beads.
Easy DIY Christmas Tree Ideas for Small Spaces
A small home can still have a tree.
- Wall tree. Shape lights, twine, or washi tape into a triangle on the wall.
- Branch tree. Stand a tall bare branch in a vase and hang mini ornaments.
- Book stack tree. Stack books from large to small and top with a star.
- Cardboard cone tree. Roll cardboard into a cone and cover it with fabric or paper.
- Tabletop tree. A small potted tree trimmed with tiny ornaments.
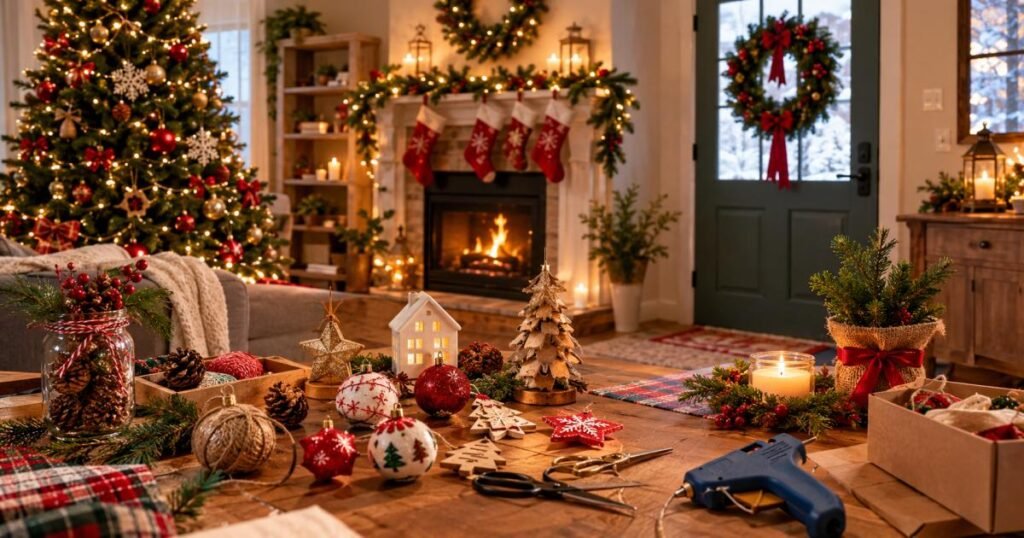
DIY Christmas Decorations for Your Home
Once the tree is up, the rest of the house needs cheer too.
DIY Christmas Mantel Decorations
Guests tend to look at the mantel first.
- Greenery garland. Lay fresh or faux evergreen along the shelf. Tuck in pinecones and small lights.
- Felt or knit stockings. Cut them from felt or an old sweater.
- Candle groups. Use three candles of different heights. Choose flameless ones if kids or pets live with you.
- Paper banner. String paper stars or flags across the front.
- Wooden letters. Spell JOY or NOEL and paint them.
Design tip: Odd numbers look better than even ones. Group items in threes or fives and mix their heights.
DIY Christmas Wall Decorations
- Yarn tree. Wrap yarn around a cardboard cone and hang it.
- Framed art. Print a simple holiday scene or favorite quote.
- Ornament branch. Hang ornaments at different lengths from a branch on the wall.
- Mini wreath trio. Hang three small wreaths in a row.
- Snowflake display. Mix sizes for a falling-snow look.
Use removable hooks to protect paint.
DIY Christmas Window Decorations
- Paper snowflakes. Tape them to the glass.
- Homemade window clings. Spread white school glue on a plastic sheet, let it dry, peel it off, and press it on the glass.
- Stencil frost. Dab on removable window spray with a stencil.
- Hanging ornaments. Tie them to the curtain rod at varied heights.
- Warm lights. Trace the frame with warm white bulbs.
DIY Christmas Decorations for Shelves and Small Spaces
- Jar scenes. Put faux snow and a tiny tree in a mason jar.
- Bottle brush trees. Cluster three to five on a shelf.
- Candle trays. Set candles, pinecones, and greenery on a tray.
- Wrapped books. Cover old books in kraft paper and tie with twine.
- Ornament bowl. Fill a wooden bowl with spare baubles.
DIY Christmas Door Decorations
Your front door greets people before you do.
Easy DIY Christmas Wreath Ideas
Evergreen wreath. Start with a wire frame. Bundle small sprigs, wire them on in layers, and overlap each one. Add a bow and pinecones.
Grapevine wreath. Buy a plain base. Tuck in faux berries, small ornaments, or dried flowers.
Embroidery hoop wreath. A wooden hoop makes a light base. Glue on greenery or felt leaves.
Paper wreath. Cut leaf shapes from green paper or old book pages. Glue them in rings on a cardboard circle.
Yarn wreath. Wrap yarn around a foam ring and add felt flowers.
Ornament wreath. Glue mixed-size ornaments onto a frame. Stick to two or three colors.
- Door garland. Frame the door with greenery.
- Hanging branch bundle. Tie pine, holly, and eucalyptus together.
- Door swag. A long, narrow bundle of greenery at the top.
- Lantern. Hang one with a battery candle inside.
- Wooden sign. Paint a short welcome message.
- Oversized bow. A big plaid or red bow can stand alone.
- Ribbon streamers. Hang long strips from one hook.
How to Make a DIY Christmas Door Display Look More Welcoming
- Add warm light. Warm white bulbs feel friendly.
- Match your door color. Green looks great on a red door. Gold and white pop on a dark one.
- Add a festive mat. It sets the mood before anyone knocks.
- Place potted evergreens by the door. Mini trees in pots look neat, and you can reuse them.
- Weatherproof your work. Outdoor ribbon and waterproof glue survive rain and snow.
- Check the weight. Use a door-rated hook. A heavy wreath can fall or dent the door.
DIY Christmas Table Decorations
A dressed table turns dinner into an event.
Easy DIY Christmas Centerpieces
- Lantern centerpiece. Fill a lantern with pinecones or ornaments.
- Candle and greenery tray. Line candles up on a long tray with pine sprigs.
- Cranberry jar. Fill a jar with cranberries and a floating candle.
- Evergreen runner. Lay a strip of greenery down the middle.
- Winter bowl. Fill a large bowl with ornaments and fairy lights.
- Clove oranges. Press whole cloves into oranges and set them in a dish.
Keep centerpieces under about 12 inches tall so guests can see each other across the table.
DIY Christmas Place Settings
- Name tags. Cut kraft paper tags and write names by hand.
- Napkin rings. Use twine, ribbon, or paper-covered cardboard tubes.
- Sprig bundles. Tie rosemary and a cinnamon stick to each napkin.
- Mini ornament favors. Each guest takes one home.
- Menu cards. Handwritten cards look classy and cost almost nothing.
DIY Christmas Table Decorations on a Budget
- Use plain white plates and add color with napkins and greenery.
- Make a runner from burlap or a strip of fabric.
- Scatter pinecones, nuts, and cinnamon sticks down the table.
- Use votive candles in jars you already own.
- Buy greenery trimmings at a tree lot near the end of the season, since many sellers discount them.
DIY Christmas Decorations for Different Styles
Pick a style first. It guides your colors and materials, so the finished look feels planned.
Rustic Christmas Decorations
Wood, burlap, twine, and pinecones. Colors run brown, cream, and deep green. Try wooden bead garlands, twig stars, and plaid ribbon.
Traditional Red-and-Green Christmas Decorations
Rich red, deep green, and gold. Velvet ribbon, felt stockings, and glass baubles fit well. Add candles and holly.
Minimalist Christmas Decorations
Pick one or two colors, such as white and green. Use a few strong pieces instead of many small ones. One branch with a handful of ornaments can look sharp.
Modern Christmas Decorations
Clean lines and bold shapes. Use metallic paint, geometric paper stars, and black and white with one pop of copper or gold.
Scandinavian-Inspired Christmas Decorations
White, gray, and natural wood. Add simple paper stars, woven hearts, and wool. Soft candlelight finishes the look.
Natural and Eco-Friendly Christmas Decorations
Dried fruit, pinecones, twigs, and cotton. Skip plastic, glitter, and tape where you can. Pick twine over plastic ribbon.
Easy DIY Christmas Decorations for Beginners
New to crafting? Start small. These six projects need little skill:
- Paper snowflakes. Fold a square of paper a few times, cut shapes, and open it.
- Dried orange slices. You need an oven and an orange.
- Snowy pinecones. Dab white paint on the tips.
- Jar lanterns. Put a battery tea light in a clean jar and wrap twine around the neck.
- Simple ribbon bow. Practice on cheap ribbon first.
- Paper chain garland. No skill needed.
Beginner tips
- Start with one project, not ten.
- Read all the steps before you begin.
- Plan for more time than you expect.
- Skip perfection. A slightly crooked star has charm.
DIY Christmas Decorations for Kids and Families
Crafting together builds memories. These ideas suit all ages:
- Handprint reindeer or trees. Press painted hands onto paper.
- Salt dough prints. Press a small hand into the dough before baking. Write the year on the back.
- Paper plate crafts. Turn plates into wreaths, angels, or Santa faces.
- Popsicle stick snowflakes. Glue sticks into a star and add glitter.
- Salt painting. Draw with glue, sprinkle salt, then touch watercolor to the lines.
- Cotton ball snowmen. Easy for small hands.
- Yearly ornament night. Each person makes one new ornament every year.
Keep kids safe
- Choose child-safe glue and paint.
- Handle the hot glue gun and oven yourself.
- Keep small beads away from toddlers.
- Cover the table with paper for easy cleanup.
Budget-Friendly DIY Christmas Decorations
You can decorate a whole home for very little.
- Shop your own house first. Jars, fabric scraps, buttons, and old books all work.
- Use nature. Pinecones, twigs, and leaves are free.
- Buy basics in bulk. Flour, salt, and twine come cheap in large packs.
- Check dollar stores. Ribbon, plain ornaments, and fairy lights typically cost a fraction of craft store prices.
- Shop after the holidays. Craft supplies are typically marked down in January. Buy for next year.
- Try thrift stores. Old frames, baskets, and wool sweaters make good raw material.
- Swap with friends. Trade the supplies you will not use.
- Stick to a color palette. It stops impulse buys.
Set a total budget before you shop, then write down each purchase.
Sustainable DIY Christmas Decorations
Holiday décor can go easy on the planet.
- Reuse first. Jars, cardboard, and fabric get a second life.
- Pick natural materials. Dried fruit, wood, wool, and paper break down on their own.
- Skip standard glitter. Most craft glitter is made of tiny plastic pieces. Use plant-based glitter or a light brush of salt for sparkle.
- Choose paper or fabric ribbon.
- Make pieces that last. A well-sewn felt ornament can stay in a family for decades.
- Compost what you can. Dried citrus and fresh greenery usually break down well.
- Use LED lights. The U.S. Department of Energy reports that LEDs use up to about 75% less energy than older incandescent bulbs.
Christmas Decorating Safety Tips
These tips follow common guidance from fire safety groups such as the National Fire Protection Association (NFPA).
- Water a real tree daily. A tree typically drinks a quart of water or more per day in the first week. A dry tree can burn in under a minute.
- Keep trees 3 feet from heat. That includes fireplaces, radiators, and space heaters.
- Inspect your lights. Look for frayed wires and cracked sockets. Throw away damaged strings.
- Do not overload outlets. Use a power strip with surge protection.
- Turn lights off when you sleep or leave home.
- Choose flameless candles when you can. If you use real ones, never leave them alone and keep them away from paper, fabric, and greenery.
- Watch for small parts. Beads and buttons are choking risks for young kids and pets.
- Know your plants. Holly and mistletoe can make pets sick. Poinsettia typically causes mild stomach upset.
- Use a proper ladder. Do not stand on a chair to hang door or window décor.
- Use outdoor-rated lights and cords outside.
For perspective, the NFPA reports that U.S. fire departments respond to roughly 150 home fires each year that start with Christmas trees. Most are preventable with water and distance from heat.
How to Make DIY Christmas Decorations Look Professional
Handmade does not have to look messy. A few habits give crafts a polished finish.
- Choose a palette. Two or three main colors plus one accent is plenty.
- Use wired ribbon. It holds its shape and makes a neater bow.
- Mix textures. Pair smooth glass with rough wood, or soft velvet with shiny metal.
- Vary height and size. It adds depth.
- Glue with care. Use small dabs and trim loose strings.
- Seal your work. Clear sealer protects paint and paper.
- Add warm lights. They flatter almost everything.
- Remove one item. Edit before you finish. Less often looks better.
- Step back. View each display from across the room and fix what looks off.
How to Store DIY Christmas Decorations for Next Year
Good storage helps handmade pieces last for years.
- Dry everything fully. Damp items can grow mold.
- Wrap fragile pieces. Use tissue paper or an egg carton for small ornaments.
- Use lidded plastic bins. They block dust, damp, and pests.
- Label every box. “Tree ornaments” and “Door décor” save time later.
- Hang or lay wreaths flat. A wreath bag or closet hook works.
- Wind garlands around cardboard. This prevents tangles.
- Keep salt dough ornaments dry. Moisture softens them.
- Store dried fruit in paper bags. Sealed plastic traps moisture.
- Pick a cool, dry spot. Hot attics and damp basements cause damage.
- Take photos. A snapshot of each setup makes next year easier.
Final Thoughts
DIY Christmas decorations do more than save money. They make a home feel like yours, and they give family and friends a reason to sit down together.
You do not need to make everything this year. Pick one idea from each area: a salt dough ornament for the tree, a simple wreath for the door, and a pinecone centerpiece for the table. Add a few more next year, and over time you will build a collection with real stories behind it.
Start small, enjoy the process, and remember that a slightly wonky handmade star will often get more compliments than a perfect one from a shelf.
FAQs
What are some easy DIY Christmas decorations for beginners?
Paper snowflakes, paper chain garlands, dried orange slices, jar lanterns, and snowy pinecones. They use cheap supplies and take under an hour.
What can I make for Christmas decorations at home?
You can make ornaments, wreaths, garlands, centerpieces, window décor, and place settings. Common materials include paper, felt, twine, pinecones, jars, fruit slices, and salt dough.
How can I make cheap Christmas decorations?
Use what you already own and what nature gives you. Pinecones, twigs, jars, old fabric, and cardboard cost nothing. Buy flour, salt, and twine in bulk, and shop craft sales in January.
What are easy DIY Christmas decorations for kids?
Handprint crafts, paper plate wreaths, popsicle stick snowflakes, cotton ball snowmen, and salt dough ornaments. Adults should handle ovens, hot glue, and sharp tools.
How can I decorate my Christmas tree with homemade ornaments?
Add lights first, then garlands, then ornaments. Put larger pieces near the trunk and lighter ones at the branch tips. Mix sizes, and stick to a color theme for a neat look.
What can I use instead of expensive Christmas decorations?
Pinecones, dried fruit, evergreen branches, fabric scraps, paper, jars, and string lights. They look warm and often feel more personal than store-bought sets.
How can I make DIY Christmas decorations look elegant?
Limit your palette to one or two colors, use wired ribbon, mix textures, and add warm lights. Gold, white, and deep green read as rich. Avoid clutter and let a few pieces stand out.
How long can homemade Christmas decorations last?
Felt, wood, and sealed salt dough can last many years with dry storage. Paper pieces typically last a few seasons. Fresh greenery and dried fruit usually last one season.